Best Oatmeal Chocolate Chip Cookies Recipe
 Pin It
This Best Oatmeal Chocolate Chip Cookie recipe was requested from one of my favorite clients. Remember to always ask me to find a good recipe and I will share it with you. That’s my kind of crazy fun!
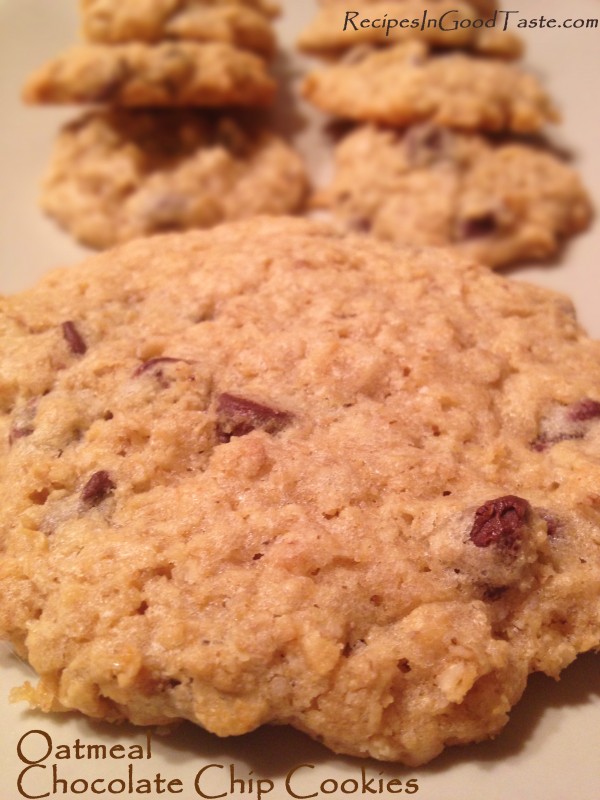
Anyway, these cookies are very good. They are a crispy golden brown on the outside and chewy on the inside and are studded with chocolate. These are sure to be a hit! And they’re sort of healthy, right? I guess aside from the copious amounts of sugar and chocolate chips. 😉
Let me show you how to make these delicious Best Oatmeal Chocolate Chip Cookies I adapted from Brown Eyed Baker.
If you need more visuals for recipes, just CLICK HERE for step by step instructions with pictures in my recipe blog post.
Enjoy the comfort of food!
Best Oatmeal Chocolate Chip Cookies
| Serves | 24 |
| Prep time | 15 minutes |
| Cook time | 13 minutes |
| Total time | 28 minutes |
| Allergy | Egg allergy, Milk Allergy (Dairy), Wheat Allergy (Gluten) |
| Dietary | Vegetarian |
| Meal type | Dessert |
| Misc | Child Friendly, Freezable, Pre-preparable, Serve Cold, Serve Hot |
| Occasion | Casual Party |
| Website | Brown Eyed Baker |
Ingredients
- 1 1/2 cup white wheat flour (all-purpose ok)
- 1/2 teaspoon baking powder
- 3/4 teaspoons kosher salt (any salt)
- 1 cup unsalted butter, at room temperature (2 sticks)
- 1 cup brown sugar
- 1 cup granulated sugar
- 2 Large eggs
- 1 1/2 teaspoon vanilla extract
- 3 cups old-fashioned rolled oats (not instant or quick oats)
- 1 1/2 cup semisweet chocolate chips
Note
Recipe URL: https://recipesingoodtaste.com/?recipe=recipe-best-oatmeal-chocolate-chip-cookies
Directions
| Step 1 | Preheat your oven to 350°F (175°C) and adjust your oven racks to low and middle positions. To prepare your baking pan, use either an ungreased cookie sheet, silicone, or parchment paper lined cookie sheet (see above for outcome for each option). | |
| Step 2 | Combine the flour, baking powder and salt in a medium sized bowl and whisk to combine. Set aside. | |
| Step 3 | In a mixer on medium speed, mix the butter and sugars until they are light and fluffy. This will take about 3 minutes. Beat in the eggs, one at a time, and then mix in the vanilla. You can also use a wooden spoon for this step; however be prepared to use a lot of muscle to get to a fluffy stage. | |
| Step 4 | Add the flour mixture to the mixing bowl and gently pulse the mixer to incorporate the flour (do not turn on mixer at full speed) OR with a wooden spoon or a large rubber spatula. Mix until just about all of the flour in incorporated (when you stir in the oats and chocolate chips it will all come together. | |
| Step 5 | Next add in the oats and mix (using the same gentle pulse vs. full on mixer) or stir with a wooden spoon to combine. Add the chocolate chips and do the same as you did for the oats to combine. Just don’t over mix or you’ll get a tough cookie. Using a small cookie scoop or tablespoon, scoop out cookie dough (I found 2 of the small cookie scoop OR tablespoon is the perfect size). Then roll the cookie dough into balls and place on the desired surface on your cookie sheets (see above for options and expected results).Be sure to space them at least 2 inches apart. Bake the cookies until the cookie edges are just turning golden brown, but the middles are still quite pale. It will look like they are not done, but they are. Just be sure to bake the cookies 12 to 14 minutes at 350°F (175°C). | |
| Step 6 | Rest the cookies on your baking sheets for 2 minutes and then transfer them to a cooling rack until they are cool (about 30 minutes.) | |
| Step 7 | Cookies can be stored in an airtight container at room temperature for up to 5 days. The cookie dough can be frozen after mixed, after you scoop and roll the cookie dough (freeze solid on a baking sheet before adding to a zip-top freezer bag) OR after they are baked and cooled. |


 Print recipe


